Removing old urethane glue from a vehicle frame is essential for effective repairs and restorations. This process can be challenging yet highly rewarding. A recent industry report indicates that improper adhesive removal leads to increased costs and extended downtime in auto body shops. Understanding "how to remove old urethane glue from a vehicle frame?" is crucial for both professional and DIY mechanics.
Urethane glue is known for its strong bonding capabilities, making it popular in automotive applications. However, its durability also means it can be tough to remove. The right techniques and tools can minimize damage and ensure a clean surface for new adhesives. According to data from the Automotive Repair Industry, professionals recommend thorough surface preparation for the best results.
Ignoring the proper removal process may lead to complications like rust formation or compromised structural integrity. Such issues can undermine the vehicle's performance and safety. Therefore, it is vital to approach this task with the right knowledge and tools.
Urethane glue is known for its strong adhesive properties. It's commonly used in automotive applications due to its durability. However, this strength makes removing it a challenge. Urethane can bond effectively to vehicle frames, creating a solid yet stubborn layer. Understanding its properties is crucial for effective removal strategies.
One challenge is the glue's resistance to solvents. Many common chemicals do not dissolve urethane effectively. Instead, specific adhesive removers or heat techniques are often necessary for softening the bond. Caution is essential to avoid damaging the underlying frame.
Tips: Use a heat gun to warm the glue gently. This will soften the adhesive, making it easier to scrape off. Always test a small area first to ensure that the heat does not harm the vehicle's surface. Patience is key; rushing can lead to mistakes and further complications.
Consider also the workplace environment. Proper ventilation is necessary when working with solvents. Prolonged exposure can lead to health issues. Always wear appropriate safety gear, such as gloves and goggles, to protect yourself during the removal process.
To remove old urethane glue from a vehicle frame, having the right tools and materials is crucial. Start with a heat gun. Its gentle heat softens the glue, making it easier to scrape off. Use a plastic scraper to avoid scratching the frame. A sturdy utility knife can also be helpful for more stubborn sections. Always exercise caution to prevent damage.
You will need solvents to break down the adhesive. Acetone and isopropyl alcohol work well in this regard. Soak a cloth in the solvent and apply it to the glued area. Let it sit for a few minutes before scraping. Safety goggles and gloves are essential. Working with chemicals requires protection to avoid skin irritation and eye damage.
As you work, be prepared for challenges. Old glue can adhere tenaciously, requiring patience. You might encounter spots that resist your efforts. It’s essential to maintain a steady, methodical approach. Sometimes, multiple applications of heat and solvent are necessary. Reflect on your methods and be willing to adjust them. Flexibility in your approach can lead to success in removing stubborn glue effectively.
Removing old urethane glue from a vehicle frame can be challenging. It requires careful planning and execution. Start by gathering essential tools: a heat gun, plastic scraper, solvent, and safety gear. Heat the glue gently with the heat gun. This helps to soften it, making it easier to scrape off. Be careful not to overheat the surrounding area to avoid damage.
Once the glue is softened, use a plastic scraper to lift it away from the frame. This requires patience, as rushing can lead to scratches or dents. You may need to repeat the heating and scraping process in stubborn areas. After most of the glue is removed, apply a solvent to the leftover residue. Allow it to sit for a bit, then wipe it clean.
During this process, it’s important to reflect on your technique. If too much glue remains, revisit the heating step. Don’t forget to wear gloves and goggles for protection. Adequate safety measures are essential. Inspect the vehicle frame carefully once you finish. Look for any hidden scraps of glue or areas that need further attention.
| Step | Description | Tools Needed | Safety Precautions |
|---|---|---|---|
| 1 | Assess the area for old urethane glue and determine the extent of removal needed. | None | Wear protective eyewear. |
| 2 | Use a heat gun to soften the urethane adhesive. | Heat gun | Keep flammable materials away from the heat source. |
| 3 | Carefully scrape off the softened glue using a plastic scraper. | Plastic scraper | Avoid using metal tools to prevent damage to the frame. |
| 4 | Clean the area with a solvent that is compatible with urethane. | Solvent, cloth | Use in a well-ventilated area and wear gloves. |
| 5 | Inspect the frame for any residue and clean as necessary until fully clear. | Cloth, solvent | Ensure proper disposal of used materials. |
When removing old urethane glue from a vehicle frame, surface preparation is crucial for effective adhesion during reinstallation. After the glue is removed, inspect the frame. Look for scratches, rust, or other imperfections. These can affect the performance of new adhesives and coatings. A clean, smooth surface will maximize bonding strength.
Use abrasive pads or sanders to prepare the surface. According to industry reports, properly prepared surfaces can enhance adhesion by up to 70%. This emphasizes the importance of thorough cleaning. Use solvents to eliminate any residue. Make sure to focus on any areas where the glue was particularly thick. There may still be hidden spots that require attention.
Once you've finished cleaning, consider applying a primer. This can improve adherence for future materials and provide an extra layer against corrosion. Even though urethane adhesives are robust, a little extra precaution never hurts. A poorly prepared surface can lead to costly repairs later on, making this step vital. Aim for a flawless finish to ensure long-lasting results.
Preventative measures are crucial in avoiding future issues with urethane glue on vehicle frames. It has been observed that improper application often leads to adhesion failures. According to recent industry reports, nearly 30% of auto body repairs fail due to inadequate surface preparation and cleaning. Ensuring surfaces are clean and free of contaminants is vital. Resins must bond with precisely prepared areas to achieve optimal strength.
Regular inspections can also help identify early signs of adhesive degradation. A study highlighted that environmental factors, such as UV exposure, can weaken urethane over time. Using protective coatings can shield the glue and prolong its effectiveness. Additionally, technicians should utilize the right mixing ratios and follow curing timelines detailed in adhesive specifications.
Training staff on proper handling techniques is equally important. Many issues arise from improper training or lack of knowledge. Enhancing employee skills can directly influence the quality of repairs and durability of bonds. Ultimately, a proactive approach will help mitigate the risks associated with urethane glue in the long run.
: Urethane glue is commonly used in automotive applications due to its strong adhesive properties.
Its strong bond makes it challenging to remove from surfaces, often requiring specific techniques.
Gently heating the glue with a heat gun can soften it, making scraping easier.
Always wear gloves and goggles for safety. Ensure proper ventilation when working with solvents.
Revisit the heating step and use a solvent to deal with any leftover residue.
It's crucial. Properly prepared surfaces can enhance adhesion significantly for future applications.
Essential tools include a heat gun, plastic scraper, solvent, and safety gear.
A poorly prepared surface can lead to ineffective adhesion and costly repairs later on.
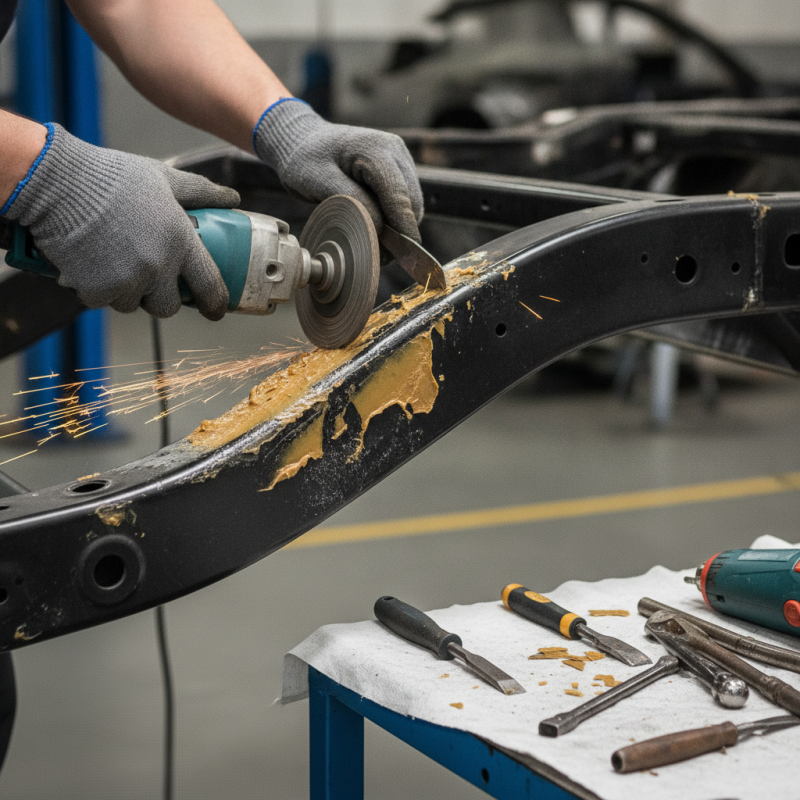
Use abrasive pads or sanders and solvents to eliminate any remaining residue effectively.
Rushing the process can lead to scratches or dents on the vehicle frame, causing potential issues.
When it comes to understanding how to remove old urethane glue from a vehicle frame, it's essential to recognize the unique properties of urethane glue and the challenges it presents during removal. This article outlines the necessary tools and materials to effectively tackle the removal process and provides a comprehensive step-by-step guide to ensure safe and efficient results.
Moreover, the article emphasizes the importance of proper surface preparation after glue removal to restore the vehicle frame’s integrity. It also discusses preventative measures that can be taken to avoid future issues with urethane glue, helping vehicle owners maintain their frames in optimal condition. By following these guidelines, individuals can effectively manage the task and avoid potential complications associated with urethane glue.
Aero Glass