Removing cured urethane from a vehicle frame requires patience, control, and a clear repair plan. The question, “How to remove old urethane glue from a vehicle frame?” sounds simple, but the answer depends on the adhesive’s age, thickness, and contact with painted metal. Old urethane can look dry while remaining rubbery underneath. It may also hide corrosion, cracked paint, or damaged primer.
Bob Beranek, an automotive glass replacement trainer and author, offers a practical warning: “Do not remove more material than necessary.” That principle protects the frame and preserves a sound bonding surface. A technician should inspect the area first, then wear gloves and eye protection. A sharp plastic or controlled cutting tool can remove thick ridges. Gentle warmth may soften some residue, but excessive heat can damage coatings and nearby components. Chemical removers require careful compatibility testing.
This guide explains how to remove old urethane glue from a vehicle frame without rushing the preparation stage. It covers tool selection, residue control, surface inspection, and final cleaning. The frame should feel solid, not merely look clean. That distinction matters.
A small test area is wise. Solvent behavior can surprise you. Paint may lift. Primer may smear. I have seen apparently minor adhesive removal become a larger refinishing task. That possibility deserves attention. The safest method is usually gradual removal, frequent inspection, and respect for the original frame finish. A perfectly bare surface is not always the correct surface for new urethane. Manufacturers’ instructions should guide the final preparation.
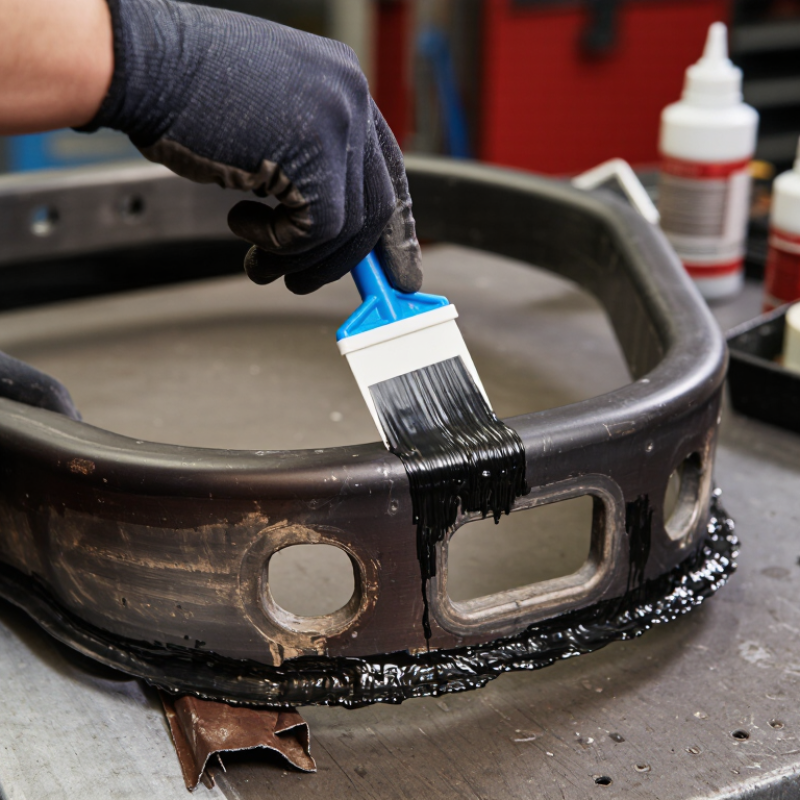
How to Remove Old Urethane Glue from a Vehicle Frame?
Identifying Old Urethane Glue on a Vehicle Frame
Old urethane glue rarely looks clean or uniform. It often appears as a black, brown, or gray rubbery ridge along the frame flange. Press it lightly with a plastic scraper. Cured urethane should feel firm, flexible, and slightly resistant, not brittle like ordinary paint. Look for torn edges, flattened beads, and dust trapped inside the adhesive. Those details often reveal where the original glass or panel was seated.
Measure the remaining bead before removal. Uneven height can indicate previous repair work or frame movement. A simple inspection light helps expose shallow residue near corners. Do not rely on color alone. Under sunlight, aged sealant may resemble undercoating or road tar. That mistake is common. My inspection checklist is not perfect, especially on heavily corroded frames.
Professional repair decisions should follow vehicle-maker procedures and recognized collision standards. The National Highway Traffic Safety Administration’s FMVSS 212 windshield retention test uses a 30-mile-per-hour frontal impact, showing why bonding surfaces matter. I-CAR technical guidance also emphasizes clean, properly prepared bonding areas before replacement glass installation. OSHA guidance warns that uncured urethane products may involve isocyanate exposure, so gloves, eye protection, and ventilation remain necessary. If the material stays soft, smells strongly, or transfers to a cloth, treat it as uncured. Do not heat it casually. A small remaining strip can hide corrosion, but aggressive grinding can remove sound metal.
How to Remove Old Urethane Glue from a Vehicle Frame?
Preparing the frame is more important than forcing the adhesive away. Park on a level surface, secure the vehicle, and inspect the frame for rust, cracks, or distorted metal. Follow the vehicle’s approved repair procedure before cutting near structural sections. Remove dirt with a vacuum and mild cleaner. Keep the work area dry. Moisture can hide corrosion under softened urethane.
Choose controlled tools, not aggressive heat. A plastic scraper, hooked hand tool, and low-speed oscillating cutter can remove residue gradually. Use a sharp blade with light pressure. Avoid open flames, uncontrolled heating, and abrasive wheels near painted or sealed areas. Test any solvent on a concealed spot first. Read its safety data sheet, provide ventilation, and wear chemical-resistant gloves, eye protection, and suitable work clothing. Do not use a respirator unless it is selected, fitted, and maintained for that exposure.
Small details matter. A 2023 U.S. Bureau of Labor Statistics report recorded about 2.6 million nonfatal private-industry workplace injuries and illnesses. Rushing a bonded repair can add unnecessary risk. The awkward part is judging “clean.” A frame may look bare while thin adhesive remains in seams. I would scrape, inspect with a bright angled light, and repeat carefully. If the metal flexes, flakes, or exposes deep corrosion, stop and obtain a qualified structural assessment. One careless cut can weaken more than the glue.
| Work Stage | Recommended Tool or Method | Typical Operating Range | Suitable Use | Main Risk | Safety and Surface-Control Measures |
|---|---|---|---|---|---|
| 1. Inspect and document | Visual inspection, paint-depth check, photographs, and masking tape | 5–10 minutes before removal | Identifying bonded areas, corrosion, cracks, thin coatings, and nearby wiring | Removing material from a structural joint or missing hidden damage | Mark the original bond line; stop if cracks, deformation, perforation, or severe corrosion are found. |
| 2. Prepare the work area | Wheel chocks, stable support stands, masking film, absorbent pads, and bright task lighting | Clean, dry, and well-ventilated area | Preventing vehicle movement and controlling debris | Vehicle movement, contamination, or debris entering components | Support the vehicle according to its service instructions; do not rely on a jack alone. |
| 3. Remove loose residue | Non-metallic scraper or plastic razor blade | Low force; work at a shallow angle | Soft, brittle, or partially detached urethane beads | Scratches, gouges, and lifting of paint | Keep the blade nearly parallel to the surface and replace it when damaged or contaminated. |
| 4. Cut thick adhesive beads | Manual adhesive-cutting knife, pull-through wire, or guarded oscillating scraper | Short passes with controlled pressure | Thick cured beads that cannot be lifted with a plastic scraper | Cutting into metal, wiring, seals, or the operator’s hand | Wear cut-resistant gloves and eye protection; shield cables and hoses before cutting. |
| 5. Use controlled heat if needed | Adjustable hot-air tool with a surface temperature monitor | Approximately 50–80 °C at the adhesive surface | Softening aged residue before scraping; effectiveness varies with cure and formulation | Paint damage, burns, smoke, or ignition of nearby materials | Use the lowest effective temperature; keep the nozzle moving and avoid open flames or uncontrolled heating. |
| 6. Remove final film | Plastic scraper, nylon abrasive pad, or hand rubbing | Light pressure; inspect frequently | Thin adhesive smears left after bulk removal | Removing protective coating or changing the surface profile | Do not use aggressive grinding unless the repair procedure specifically permits it. |
| 7. Select a cleaner | Cleaner specifically confirmed as compatible with the frame coating and substrate | Use only as directed on the product safety and technical data sheets | Reducing light residue after mechanical removal | Coating softening, staining, corrosion, or harmful vapors | Test in an inconspicuous area first; never assume a general solvent is safe for paint or plastics. |
| 8. Final surface preparation | Lint-free cloth, approved surface cleaner, and clean dry air | Surface should be dry and free of oil, dust, and loose coating | Preparing for inspection, coating repair, or approved re-bonding | Trapped moisture or contamination beneath a new bond | Allow cleaner to evaporate fully; do not use compressed air that contains oil or water. |
| 9. Inspect after removal | Bright light, straightedge, inspection mirror, and corrosion assessment | Inspect the full bonded region and adjacent metal | Finding pitting, distortion, exposed bare metal, or remaining adhesive | Reusing a damaged or weakened structural surface | Stop and obtain qualified repair guidance if the area is structural or the metal is damaged. |
| 10. Dispose of waste | Sealed waste container and locally approved disposal method | Keep adhesive scraps and solvent cloths separate | Preventing fire, vapor exposure, and environmental release | Ignition of solvent-contaminated materials or improper disposal | Follow local waste rules and the cleaner’s safety data sheet; keep waste away from heat sources. |
Removing old urethane from a vehicle frame is rarely a simple scraping job. Once cured, it behaves like tough rubber bonded to painted metal. The safer approach is to soften the adhesive gradually, then lift it in controlled layers. Work outdoors or in a well-ventilated bay. Wear chemical-resistant gloves and eye protection.
I usually warm a small section with a controlled heat source. Keep it moving and away from wiring, seals, and coatings. Use a noncontact thermometer when possible. After the bead becomes slightly flexible, slide a plastic scraper under one edge. Pull low and slowly. A nylon brush can remove thin residue from grooves. Avoid aggressive grinding near welds. Heat helps, but too much creates a bigger repair.
Solvent choice needs patience. Test a small amount on a hidden area and watch for swelling, discoloration, or softening. Some cleaners attack primer faster than urethane. My first attempt was too forceful, and it left shallow scratches requiring extra preparation. That mistake still matters. Remove residue in short passes and wipe with clean cloths. Inspect the metal under bright light. Stop if the frame shows cracking, distortion, or corrosion, because structural damage deserves qualified inspection.
Old urethane glue should be removed slowly. The frame surface matters more than speed. Begin by brushing away dust and loose fragments. Use a sharp plastic scraper, not a metal blade. Keep the scraper nearly flat. This reduces scratches and gouges. Warm the adhesive gently with a heat gun on its lowest setting. Move it constantly. Excessive heat can soften paint, warp coatings, or damage nearby seals. Work in small sections, about five centimeters at a time. Leave a thin residue layer rather than forcing every piece away.
Tips: Wear chemical-resistant gloves and eye protection. Improve ventilation before using any adhesive remover. Test the remover on a hidden area first. Some coatings react slowly, so wait several minutes. Wipe with clean, lint-free cloths. Do not flood seams, drain holes, or electrical connections. A plastic razor may work better than a rigid scraper.
For remaining residue, choose a remover labeled as compatible with painted metal and cured urethane. Apply it to the cloth instead of pouring it directly onto the frame. Dab the residue, then lift it gently. Repeat the process when necessary. Rushing often spreads softened glue across a larger area. That is an easy mistake to make.
Inspect the surface under bright light. If the coating becomes dull, sticky, or discolored, stop immediately. A frame with structural bonding or unknown factory coatings should be assessed by a qualified repair professional. Surface preparation is not the place to guess.
Before applying new adhesive, inspect the vehicle frame under bright, even lighting. Old urethane may look removed while a thin, glossy film remains in the corners. That residue can weaken the next bond. Wear chemical-resistant gloves, eye protection, and suitable ventilation. Use a plastic scraper for loose material, then remove stubborn sections with a controlled cutting tool. Avoid gouging the painted metal.
Check the frame for rust, dents, cracked paint, and exposed bare steel. Pay close attention to pinch welds, seams, and drain areas where moisture collects. Run a clean fingertip along the bonding path. It should feel smooth, firm, and free from oily residue. Do not trust appearance alone. I have seen clean-looking surfaces release dust onto a cloth. A second inspection is worth the few extra minutes.
Follow the vehicle’s approved repair procedure for remaining adhesive thickness, surface treatment, and curing conditions. Some systems require a specific primer on bare metal, while others need lightly abraded paint. Never guess when the substrate is damaged. Remove loose corrosion, but stop if structural metal appears thin or deeply pitted. Wipe the prepared area with a compatible residue-free cleaner, using fresh lint-free cloths and changing them often. Let the surface dry completely. Keep hands, tools, and workshop dust away from the bonding path. Before opening the adhesive, test-fit the replacement component and mark its position. A perfect surface cannot correct poor alignment.
Park on level ground and secure the vehicle firmly. Inspect for rust, cracks, distorted metal, and loose coatings. Follow the approved repair procedure before cutting near structural areas. If the frame flexes or flakes, stop. Obtain a qualified structural assessment.
Use a plastic scraper, hooked hand tool, or low-speed oscillating cutter. Keep sharp blades nearly flat and apply light pressure. Work slowly in small sections. Aggressive tools can scratch or weaken the frame surface.
Use gentle heat only when the coating allows it. Set a heat gun low and keep it moving constantly. Avoid open flames and uncontrolled heating. Excessive heat may soften paint, warp coatings, or damage nearby seals.
Choose a sharp plastic scraper instead of a metal blade. Hold it almost flat against the surface. Remove loose pieces before scraping bonded residue. A plastic razor may work better around delicate coatings.
Select a remover compatible with painted metal and cured urethane. Test it on a hidden area first. Apply the product to a cloth, not directly onto the frame. Dab gently, wait briefly, and lift softened residue.
Wear chemical-resistant gloves, eye protection, and suitable work clothing. Improve ventilation before using any remover. Keep the work area dry and clear. Use a respirator only when properly selected, fitted, and maintained.
Remove dust with a vacuum and mild cleaner. Inspect seams, drain holes, and edges carefully. Use bright angled light to find thin adhesive films. I might leave a slight residue layer rather than gouge the metal.
Stop if the coating turns dull, sticky, or discolored. Stop if deep corrosion, cracks, or flexible metal appears. Do not flood seams or electrical connections. Guessing here can create a larger repair problem.
How to remove old urethane glue from a vehicle frame? Start by identifying the hardened adhesive and checking whether it is bonded to painted metal, bare steel, or another surface. Prepare the work area with proper ventilation, gloves, eye protection, and coverings for nearby components. Choose safe removal tools, such as plastic scrapers, controlled heat, and non-abrasive hand tools, while avoiding methods that could warp, scratch, or weaken the frame.
Soften the urethane gradually and lift it away in manageable sections rather than forcing it from the surface. After the main adhesive is removed, clean the remaining residue with a compatible cleaner and a soft cloth, testing it first in a hidden area to protect the frame’s finish. Finally, inspect the surface for scratches, corrosion, moisture, or leftover contamination. The frame should be clean, dry, sound, and properly prepared before applying new adhesive.

Aero Glass