Installing a tractor window frame is more than fitting glass into a metal opening. It affects visibility, weather protection, cabin noise, and operator safety. This guide answers the practical question: “How to install a complete window frame assembly on a tractor?” The process covers preparation, frame inspection, seal placement, fastener alignment, glass handling, and final testing. A clean workshop floor, correct tools, and the tractor’s service manual should guide every decision.
The National Institute for Occupational Safety and Health reports that rollover protective structures and seat belts can prevent nearly all deaths in protected tractor overturns. That evidence makes correct cab work essential, even when the window appears unrelated to rollover protection. OSHA also stresses equipment inspection and safe maintenance procedures before work begins. Agricultural safety specialist Charles V. Schwab is often credited with saying, “The most important safety feature on a tractor is the operator.” That principle belongs beside every installation step. Do not force a distorted frame. Do not reuse damaged seals. A small gap can invite dust, rain, vibration, and distracting noise.
Field experience reveals an uncomfortable point: installation instructions are rarely perfect across tractor models. Bolt holes may shift slightly. Rubber seals may harden. Glass may sit unevenly after years of vibration. Therefore, this article combines manufacturer guidance, recognized safety recommendations, and practical inspection habits. Readers should verify part numbers, torque values, glazing requirements, and cab specifications before tightening anything. Careful work takes longer. It usually prevents a second repair.
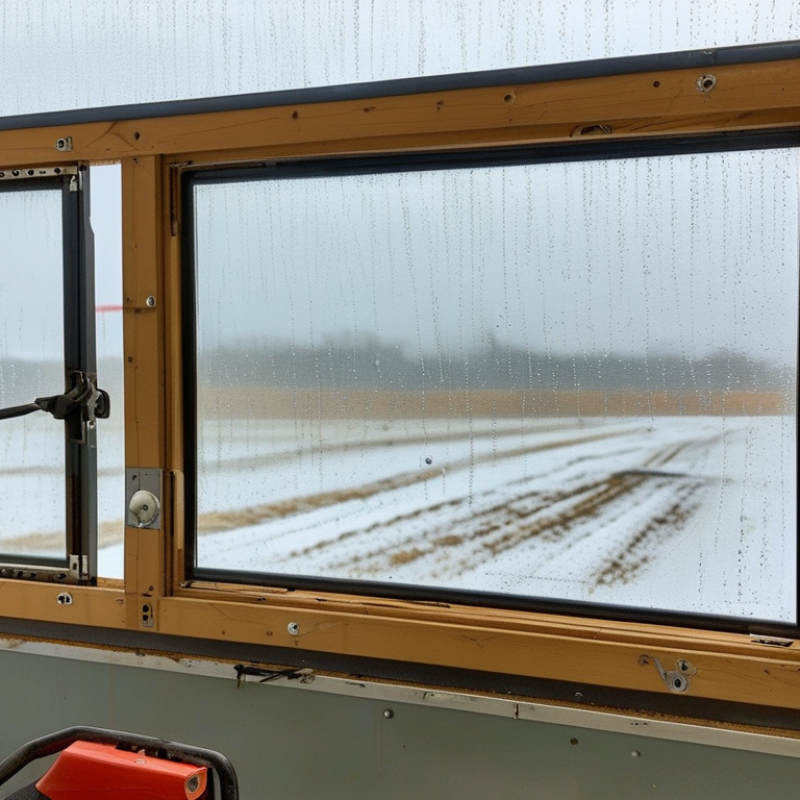
Identify the Tractor Window Frame Type and Installation Requirements
A complete tractor window frame starts with accurate identification. Check the cab opening, hinge location, glass thickness, seal channel, and latch position. Measure width at three points. Older cabs are rarely perfectly square. That detail matters.
Tip: Photograph every corner before removal.
Confirm whether the frame supports laminated glass, polycarbonate, or safety glass. The material must match the tractor’s original specification. NIOSH identifies tractor overturns as a leading cause of farmwork deaths. Its safety guidance stresses a certified protective structure, secure glazing, and seat-belt use. A window frame must not weaken that structure.
Review the tractor service manual and applicable ISO 3449 or ISO 3471 requirements. These standards address protective structures and impact performance. Industry repair guidance also recommends replacing cracked seals, distorted hinges, and damaged fasteners. Do not reuse stretched rubber. It may look serviceable, but vibration can expose the mistake.
Tip: Test-fit the empty frame before applying sealant.
Installation requirements include clean contact surfaces, correct bolt grades, uniform tightening, and controlled sealant thickness. Avoid forcing a frame into alignment. That can create hidden stress around the glass. After fitting, open and close the window repeatedly. Check water entry with a gentle hose, not a pressure washer.
One practical lesson is easy to overlook: dust under the seal can cause a leak weeks later. Recheck fasteners after initial field use. The process is not always perfect, so document measurements and correct small alignment errors early.
Top 10 Tips to Install a Complete Tractor Window Frame
Tip 1: Gather every tool before removing the old frame. Prepare screwdrivers, trim tools, a socket set, a torque wrench, suction handles, and a clean work surface. Wear cut-resistant gloves and safety glasses. Small metal clips can fall unexpectedly.
Tip 2: Check the replacement frame, glass, seals, hinges, clips, and fasteners against the service manual. Measure the opening before installation. A few millimeters matter. Never assume the supplied parts match your tractor. I once overlooked one retaining clip, and the frame shifted during fitting. That mistake slowed the job.
Tip 3: Clean dust and rust from the mounting area. Use a plastic scraper instead of a sharp blade near painted surfaces. Keep the glass supported with two people or approved suction handles. Do not force a tight frame into place. Stop and inspect the alignment.
Tip 4: Install the seal evenly, without stretching it at the corners. Start each fastener by hand, then tighten them gradually in a cross pattern. Use the specified torque from a reliable service manual. Excessive force may distort the frame or crack the glass.
Tip 5: Test the window before replacing interior panels. Open and close it several times. Check the latch, drainage path, and rubber seal for gaps. A gentle water test can reveal leaks, but avoid high-pressure spraying. Recheck the fasteners after the first work session. Mistakes happen, so inspect your work carefully.
Removing a damaged tractor window frame starts with protecting the cab, not forcing the glass. NIOSH estimates that tractor overturns cause about 130 U.S. deaths each year. Treat the cab as a safety structure. Park on level ground, lower attachments, stop the engine, and disconnect the battery. Photograph the frame, seals, hinges, and wiring before removal. Small details matter.
Wear cut-resistant gloves and safety glasses. Support the glass with suction handles before loosening fasteners. Remove trim with plastic tools, not screwdrivers that can gouge painted metal. Mark each bolt location with tape. Keep the door or panel supported; its weight can twist the opening. OSHA guidance emphasizes controlling stored energy and preventing unexpected movement during maintenance. Never lean against the glass.
Cut old sealant gradually with a hooked blade, keeping the blade shallow. Do not strike the frame with a hammer. That vibration may distort the cab opening or disturb nearby mounts. NIOSH reports that rollover protective structures and seat belts dramatically reduce fatal-crush risk, so never remove structural cab components without approved service instructions. Measure the opening at four points before installing the replacement frame. It should remain square. I have seen a frame fit perfectly at the top, then bind at the lower hinge. That mistake usually reflects rushed measuring, not bad parts. Leave damaged mounting points for qualified repair assessment.
| No. | Installation Tip | Tools and Materials | Recommended Procedure | Estimated Time | Completion Check |
|---|---|---|---|---|---|
| 1 | Confirm the Replacement Frame | Tape measure, inspection light, installation manual | Measure the opening width, height, corner radius, hinge locations, latch position, and mounting-hole pattern. Compare these measurements with the replacement frame before removing the old assembly. | 15–25 min | The frame dimensions and mounting points match the cab opening. |
| 2 | Prepare a Safe Work Area | Wheel chocks, parking brake, gloves, safety glasses, protective covers | Park on level ground, lower attached equipment, stop the engine, remove the key, and secure the tractor against movement. Cover the seat, controls, dashboard, and painted cab surfaces. | 10–15 min | The tractor cannot roll and the cab interior is protected from dust and debris. |
| 3 | Support the Window and Frame | Two-person lifting support, padded stands, suction handles | Support the glass and frame before loosening hinges, gas struts, or retaining hardware. Never allow the window to hang from one hinge or one remaining fastener. | 10 min | The frame is stable and fully supported before fasteners are removed. |
| 4 | Remove Interior Trim Carefully | Plastic trim tools, screwdrivers, labeled storage bags | Remove trim panels, covers, seals, and interior fastener caps without prying directly against painted metal or glass. Label each part and record its original position. | 20–40 min | Trim clips, seals, wiring, and painted surfaces remain undamaged. |
| 5 | Disconnect Hardware and Accessories | Socket set, hex keys, combination wrenches, marker, tape | Disconnect wiper arms, washer hoses, electrical connectors, gas struts, latches, or sensors when fitted. Mark hinge positions and protect exposed connectors from moisture. | 20–35 min | All connected components are identified, disconnected, and protected. |
| 6 | Remove the Damaged Frame | Correct-size sockets, penetrating fluid if required, padded support | Loosen fasteners gradually and alternate between sides to prevent twisting the cab opening. Keep the frame supported while the final fasteners are removed. Avoid cutting or drilling near the cab structure unless approved by the service procedure. | 30–60 min | The frame is removed without bending the cab flange or enlarging mounting holes. |
| 7 | Inspect and Clean the Cab Opening | Plastic scraper, lint-free cloth, mild cleaner, corrosion treatment | Remove old sealant, dirt, and loose paint from the mounting surface. Inspect for cracks, corrosion, distorted flanges, water channels, and damaged threaded inserts before installing the new frame. | 20–40 min | The opening is flat, clean, dry, and free from sharp edges or active corrosion. |
| 8 | Dry-Fit the Complete Frame | Replacement frame, temporary fasteners, feeler gauge, measuring tape | Place the complete frame into the opening without sealant. Center it from side to side, check the diagonal measurements, verify latch clearance, and confirm that the seal contacts evenly around the cab. | 20–30 min | The frame is square, centered, and free from interference with the cab or surrounding panels. |
| 9 | Install and Tighten the Frame | Approved sealant or gasket, torque wrench, alignment shims, clean gloves | Apply only the sealant or gasket type specified for the frame. Install fasteners by hand first, tighten them in a crisscross pattern, and use the vehicle service specification for final torque. Do not overtighten and distort the frame. | 30–50 min | The seal is continuous, fasteners are evenly tightened, and the frame remains aligned. |
| 10 | Test Operation and Water Resistance | Water hose with low-pressure spray, clean cloth, inspection light | Reconnect accessories, install trim, and open and close the window several times. Check latch engagement, hinge movement, seal compression, visibility, and water leakage using a gentle spray rather than a pressure washer. | 20–35 min | The window operates smoothly, latches securely, and the cab remains dry after testing. |
A complete tractor window frame depends on alignment, not force. Field repairs often fail when installers rush the first measurement. The U.S. Bureau of Labor Statistics recorded a 23.5 fatality rate per 100,000 workers in agriculture, forestry, fishing, and hunting in 2022. Safe positioning matters.
Tip 1: Park on level ground, lower attachments, stop the engine, and remove the key. Wear cut-resistant gloves and eye protection. Tip 2: Compare the new frame with the old opening. Check hinge locations, latch clearance, gasket channels, and bolt spacing. Tip 3: Clean rust, paint flakes, and packed soil from every mounting surface. Even a thin layer can shift alignment. Tip 4: Place the frame loosely first. Do not tighten one corner completely. Tip 5: Use a ruler and diagonal measurements. Matching diagonals usually indicate a square opening.
Align the upper edge before the lower edge. Insert temporary bolts or alignment pins, then tighten each fastener gradually in a cross pattern. Tip 6: Keep the frame centered while checking equal gaps on both sides. Tip 7: Confirm the window opens without rubbing. Tip 8: Inspect the seal for twists and compression. Tip 9: Follow the equipment service manual for torque values; guessing can distort the frame. OSHA guidance also emphasizes controlled energy and safe machine servicing. Tip 10: Recheck every fastener after the first working cycle. I still find small gaps after installation sometimes. That is not failure, but it requires correction before dust, water, or vibration creates a larger problem.
This chart summarizes the main installation checks for aligning and securing a tractor window frame. The values represent the recommended number of verification points at each stage.
After installing a tractor window frame, inspect every seal by hand. A continuous rubber seal should feel firm, flexible, and evenly compressed. Look for pinched corners, gaps, or sections lifting from the channel. Even a small opening can admit dust, rain, and vibration. The U.S. Bureau of Labor Statistics reported a 23.2 fatal injury rate per 100,000 workers in agriculture, forestry, fishing, and hunting during 2023. Clear visibility and weather protection deserve serious attention.
Check the glass fit before tightening all fasteners. The pane should sit centered, without touching bare metal. Use a thin, consistent clearance around the glass. If one corner rocks, stop and correct the frame position. Do not force the glass into place. The International Organization for Standardization’s ISO 16231 visibility guidance emphasizes unobstructed operator sightlines for mobile machinery. That principle applies during a practical workshop inspection, not only during certification.
Operate the window several times. It should open, close, latch, and stay supported without scraping or sudden resistance. Listen for clicking seals and watch whether the frame twists. A second person can observe the hinge side while you operate the handle. Check again after the first working day; fasteners may settle, and seals may relax. I once trusted a smooth latch too quickly. Later, a misaligned corner revealed itself in heavy rain. That mistake was preventable.
: Check the cab opening, hinge location, seal channel, latch position, and glass thickness. Measure the width at three points. Older cabs may not be perfectly square. That small difference matters.
Match the replacement material with the original specification. Possible materials include laminated glass, polycarbonate, or safety glass. Do not guess from appearance alone. Check the service manual.
Photograph every corner, hinge, seal, fastener, and nearby wiring. Mark each bolt location with tape. Measure the opening at four points. Keep the door or panel supported.
Park on level ground and lower all attachments. Stop the engine and disconnect the battery. Support the glass with suction handles. Never lean against the glass.
Wear cut-resistant gloves and safety glasses. Use plastic trim tools near painted metal. Cut sealant gradually with a shallow blade. Do not strike the frame with a hammer.
Replace cracked seals, distorted hinges, and damaged fasteners. Do not reuse stretched rubber. It may look usable. Vibration can later create leaks or movement.
Clean all contact surfaces before fitting. Test-fit the empty frame before applying sealant. Use correct bolt grades and tighten them evenly. Do not force alignment.
Open and close the window repeatedly. Check for binding around the hinges and lower frame. Test water entry with a gentle hose. Avoid a pressure washer.Recheck fasteners after early field use. Dust under the seal can cause a leak weeks later. The process is not flawless. Document measurements and correct small errors early.
Installing a complete tractor window frame safely begins with identifying the correct frame type, dimensions, mounting points, and installation requirements for the cab. Before starting, gather the necessary hand tools, replacement hardware, approved sealants, protective gloves, eye protection, and any equipment needed to support the glass. Carefully remove the damaged frame without bending the cab structure, scratching painted surfaces, or placing stress on nearby wiring and interior panels. This preparation helps answer the question: How to install a complete window frame assembly on a tractor?
Next, position the replacement frame gradually, checking its alignment with the cab opening on every side. Secure the fasteners evenly and avoid overtightening, which may distort the frame or affect the glass. After installation, inspect the seals for continuous contact, confirm that the glass sits correctly, and test the frame’s opening, closing, locking, and movement. A final check for gaps, looseness, vibration, and water entry helps ensure a secure, properly functioning installation.

Aero Glass